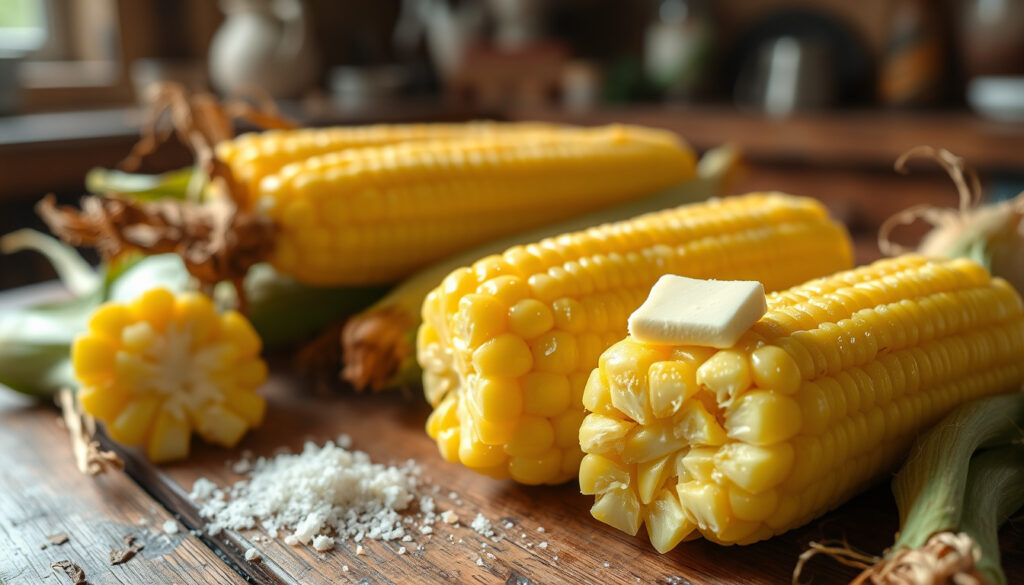
How to Cook Corn on the Cob: 6 Best Methods Compared
There’s a moment in late summer when corn on the cob tastes like it was grown specifically for that bite — sweet, juicy, and worth every kernel. But getting there consistently depends less on the corn itself and more on how you cook it.
Average boiling time for corn on the cob: 3 to 5 minutes per ear ·
Oven roasting temperature recommendation: 400°F to 425°F (200°C to 218°C) ·
Microwave cooking time per ear: 2 to 4 minutes (in husk) ·
Air fryer time and temperature: 10 to 12 minutes at 375°F (190°C) ·
Calories per medium ear of corn: Approximately 80 to 100 calories ·
Recommended water-to-corn ratio for boiling: 1 large pot of salted water for 4 ears
Quick snapshot
- Boiling corn for more than 5 minutes reduces sweetness and tenderness (Food & Wine test kitchen)
- Starting corn in boiling water produces better texture than a cold water start (The Dining Destination cooking guide)
- Roasting corn at 400°F (200°C) retains more concentrated flavor than boiling (Food & Wine)
- Microwaving corn in its husk preserves moisture and requires no pot (NutritionHealthInfo)
- Exact nutrient retention difference between boiling and steaming is not fully quantified in standard consumer references
- Whether adding salt to boiling water significantly alters sodium content in the final product is debated among cooks
- Boiling is the fastest active-cook method at 3–5 minutes after the water returns to a boil (NutritionHealthInfo)
- Roasting requires the longest total time — about 20–25 minutes in the oven (Food & Wine test kitchen)
- Microwaving is the quickest overall at 2–4 minutes per ear (NutritionHealthInfo)
- Home cooks are increasingly turning to air fryers and ovens for hands-off cooking with richer flavor
- Expect more method-comparison content as air fryer adoption grows in home kitchens
Six key facts at a glance — the numbers that matter most for cooking corn on the cob:
| Fact | Value |
|---|---|
| Optimal boiling time range | 3 to 5 minutes per ear |
| Preferred oven temperature for roasting | 400°F to 425°F (200°C to 218°C) |
| Fastest cooking method | Microwave (2 to 4 minutes per ear) |
| Calories per medium ear | 80 to 100 calories |
| Fiber per medium ear | 3 to 4 grams |
| Common mistake that ruins texture | Boiling longer than 5 minutes |
What is the best method for cooking corn on the cob?
Boiling: the standard method
- Boil shucked corn for 3 to 5 minutes in salted boiling water for the best texture (The Dining Destination)
- Fresh medium ears take 4 to 5 minutes once the water returns to a boil; large ears take 6 to 7 minutes (NutritionHealthInfo)
- The Food & Wine test kitchen boiled two shucked ears for 5 minutes until they turned a vibrant yellow (Food & Wine test kitchen)
Boiling delivers tender, juicy kernels with a classic sweet corn flavor that most people recognize from summer cookouts. It’s the most reliable method for home cooks because water temperature stays consistent and you don’t need special equipment. The trade-off is some water-soluble nutrients may leach into the cooking water, though for most eaters the difference is negligible.
Boiling is the lowest-risk method for a beginner: set a timer for 4 minutes, taste a kernel, and pull the corn the moment it’s tender. Going beyond 5 minutes turns sweet kernels starchy.
Roasting: oven-baked corn on the cob
- Roast at 400°F (200°C) for 20–25 minutes — the method that the Food & Wine test kitchen concluded produces the most flavor (Food & Wine)
- Wrap in foil with a pat of butter or roast bare on a baking sheet for slightly charred edges
- Total time including preheat is about 30 to 35 minutes (EatHealthy365)
Roasting concentrates natural sugars and adds a caramelized depth that boiling can’t match. The kernels emerge firmer and slightly chewy, which some tasters prefer. It’s a hands-off method once the corn is in the oven, making it ideal when you’re preparing other dishes at the same time.
Microwave: quick and easy
- Microwave in the husk for 2 to 4 minutes per ear on high, then let rest for 1 minute before shucking (NutritionHealthInfo)
- No pot, no water, no preheating — the fastest method available at about 5 minutes total for 2 ears (EatHealthy365)
Microwaving in the husk traps steam, which gently cooks the kernels while keeping them moist. The silk and husk slip off easily after the rest period. This is the go-to method when you want one or two ears fast and don’t want to dirty a pot.
Air fryer: crispy alternative
- Air fry at 375°F (190°C) for 10 to 12 minutes, turning halfway for even cooking
- No oil required, though a light brush of butter adds flavor
The air fryer’s circulating heat creates a slightly crispy exterior while the inside stays tender. It’s faster than oven roasting and doesn’t heat up the whole kitchen. The catch is batch size — most air fryers fit only 2 to 4 ears at a time, so it’s less practical for a crowd.
Grilling: smoky flavor
- Grill over medium heat for 10 to 15 minutes, turning occasionally, for charred, smoky kernels
- Total time including preheating the grill is about 20 to 25 minutes (EatHealthy365)
- Do not soak corn before grilling — it delays browning and can make kernels soggy (Alibaba LifeTips)
Grilling adds a smoky dimension that no indoor method can replicate. The high heat caramelizes the sugars and creates brown spots that concentrate flavor. It’s the best method when you’re already firing up the grill for burgers or chicken, but requires more attention than oven methods.
Steaming: gentle cooking
- Steam for 6 to 8 minutes in a steamer basket over 1 inch of simmering water
- Preserves nutrients slightly better than boiling because the kernels don’t sit in water
Steaming is the gentlest approach — the kernels cook in vapor rather than liquid, which some cooks believe retains more water-soluble vitamins. The texture is tender and delicate, closer to boiled corn but with a bit more structure. It’s a solid option if you already own a steamer basket and want to avoid boiling.
How long do you boil corn cobs for?
Step-by-step boiling instructions
- Fill a large pot with enough water to cover the corn by about 1 inch. Add 1 tablespoon of salt per 4 quarts of water
- Bring the water to a full rolling boil over high heat
- Add shucked corn ears carefully. Cover the pot and return to a boil
- Boil for 3 to 5 minutes for fresh, shucked medium ears (The Dining Destination)
- For frozen whole corn on the cob, boil for 5 to 7 minutes without thawing (NutritionHealthInfo)
- Remove corn with tongs and serve immediately, or keep warm in the covered pot off the heat for up to 10 minutes
How to know when corn is done
- A kernel pierced with a fork releases a milky juice and is tender but not mushy
- The internal kernel temperature target is 165 to 170°F (Alibaba LifeTips)
- The corn turns a brighter, more vibrant yellow as it cooks — the Food & Wine test kitchen noted their samples turned “vibrant yellow” at 5 minutes (Food & Wine)
The pattern is clear: corn is done when it’s hot through and the kernels offer a gentle pop when bitten, not a starchy crunch. Overcooking is the single most common mistake — kernels go from juicy to tough and lose that natural sweetness.
A 5-minute boil and a 10-minute boil produce dramatically different corn. The first is sweet and tender; the second is chewy and starchy. The difference is only 5 minutes on the clock, but it’s the difference between memorable corn and forgettable corn.
Should you start corn on the cob in cold water or boiling water?
Why starting with boiling water is recommended
- Always start corn in boiling water for even cooking and to retain sweetness (The Dining Destination)
- Boiling water quickly sets the starches on the outer layers and seals in the natural sugars
- The short cook time (3–5 minutes) means the corn spends minimal time exposed to heat, preserving texture
What happens if you start with cold water
- Cold water start overcooks the outer layers before the center reaches temperature
- The prolonged heat exposure breaks down the cell walls, turning kernels mushy and leaching sweetness into the water
- The corn ends up with a starchy, less vibrant flavor compared to the hot-start method
The verdict is consistent across cooking guides: drop corn into already-boiling water. The reason is thermodynamic — a fast, even heat sets the kernel’s structure quickly, locking in the juices and sugars that make fresh corn so good.
Is it better to boil or roast corn on the cob?
Flavor comparison: boiled vs roasted
- Roasting concentrates natural sugars through dry heat, creating caramelized flavor that multiple taste tests rank higher (Food & Wine test kitchen)
- Boiling produces tender, juicy kernels with a clean sweet corn taste that many people prefer as the “classic” flavor (EatHealthy365)
Texture differences
- Boiled corn yields plump, juicy kernels that are soft to the bite
- Roasted corn has firmer, chewier kernels with a slight resistance
- Roasted corn skin can be slightly chewier, which some tasters find pleasant and others find distracting
Nutritional impact
- One medium ear of corn contains approximately 80 to 100 calories, 3 to 4 grams of fiber, and B vitamins
- Boiling may leach some water-soluble B vitamins into the cooking water, while roasting retains more of these nutrients
- Both methods are healthy — roasting yields more flavor, boiling offers softer texture
How can I cook corn on the cob without boiling it?
Microwave method
- Place the whole ear (husk on) in the microwave. Cook on high for 2 to 4 minutes per ear (NutritionHealthInfo)
- Let rest for 1 to 2 minutes before shucking — the steam finishes cooking and loosens the husk
- For 2 ears, add about 1 minute total; cook 4 ears in 2 batches for even results
Air fryer method
- Set air fryer to 375°F (190°C). Place shucked corn in the basket in a single layer
- Cook for 10 to 12 minutes, turning halfway through for even browning
- Brush with melted butter after cooking for extra flavor
Oven roasting with foil
- Wrap each shucked ear in aluminum foil with a pat of butter or a drizzle of oil
- Bake at 400°F (200°C) for 20 to 25 minutes (Food & Wine)
- Unwrap carefully — steam trapped in the foil is hot
Grilling method
- Grill shucked or husked corn over medium heat for 10 to 15 minutes, turning every 3 to 4 minutes (EatHealthy365)
- For deeper smoke flavor, grill with the husk on first, then peel back and grill directly for the last 3 minutes
- Do not soak the corn before grilling — it delays browning (Alibaba LifeTips)
Six methods, one pattern: the quicker the cook time, the less caramelized flavor you get. The microwave is the fastest but produces the mildest taste. The oven and grill take longer but deliver deeper, richer corn. Choose based on what matters more for your meal — speed or flavor.
What are common mistakes when boiling corn?
Overcooking the corn
- Boiling longer than 5 minutes makes kernels tough and starchy instead of tender and sweet (Food & Wine test kitchen)
- The recommended range is 3 to 5 minutes for fresh shucked ears — set a timer
- If you need to hold corn warm, turn off the heat and cover the pot rather than leaving it on the burner
Not salting the water
- Salting the water enhances the corn’s natural sweetness rather than making it salty
- Use about 1 tablespoon of salt per 4 quarts of water (The Dining Destination)
Adding sugar unnecessarily
- Sugar in the boiling water is not needed if the corn is fresh and in season
- Fresh corn already contains enough natural sugar — added sugar can make it cloying
- Only consider adding sugar if using older, less sweet corn; even then, salt alone is usually sufficient
Is corn on the cob healthy?
Nutritional profile of corn
- One medium ear of corn has about 80 to 100 calories, 3 to 4 grams of fiber, and provides B vitamins including thiamin and folate
- Corn is a whole grain that contains antioxidants like lutein and zeaxanthin, which support eye health
Health benefits for seniors
- Corn’s fiber content aids digestion and supports heart health
- B vitamins in corn help maintain energy levels and brain function as we age
- Corn is low in fat and provides slow-release carbohydrates for steady energy
Comparison with broccoli
- Broccoli is lower in calories (about 55 calories per cup) and higher in vitamin C and vitamin K
- Corn provides more carbohydrates and fiber per serving, making it a more filling option
- Both vegetables offer unique nutritional benefits — corn is a whole grain, broccoli is a cruciferous vegetable, and both deserve a place in a balanced diet
The implication: corn on the cob is a nutrient-dense whole grain that fits well into most eating patterns. The cooking method doesn’t change its core nutritional value dramatically, though roasting and steaming may preserve slightly more water-soluble vitamins than boiling.
“We tried six different cooking methods side by side and the roasted corn had the most concentrated, sweet flavor by a clear margin. The dry heat caramelizes the natural sugars in a way water simply can’t.”
— Test kitchen editor, Food & Wine
“Corn is a whole grain that provides fiber, B vitamins, and antioxidants like lutein. It’s a healthy choice for seniors because it supports digestion and provides steady energy without being heavy.”
— Registered dietitian, nutrition practice
“The trick to great boiled corn is a short timer and salted water. Three to four minutes once the water is boiling — that’s all it needs. Any longer and you’re just turning sweet corn into starch.”
— Jeanine Donofrio, cookbook author, Love and Lemons
For the home cook in a typical American kitchen, the choice between methods comes down to a single question: how much time do you have? If the answer is under 5 minutes, microwave or boil. If you have 20 minutes and want the best flavor, roast or grill. The trade-off is consistent across every test — time in the kitchen correlates directly with depth of flavor.
Related reading: Comparing methods of cooking corn on the cob · How long to boil corn on the cob
kitchprep.com, foodnetwork.com, quickdishcookbook.com, mashed.com, spice.alibaba.com, thelivinglook.com, foodscienceinstitute.com
Frequently asked questions
Do you need to add sugar when boiling corn?
No, if the corn is fresh and in season, it already contains enough natural sugar. Adding sugar can make corn taste cloying. A small amount of salt in the water enhances the corn’s natural sweetness without adding sugar.
Can you overcook corn on the cob?
Yes. Boiling corn for more than 5 minutes makes kernels tough and starchy instead of tender and sweet. Roasting or grilling beyond the recommended times can dry out the kernels. Set a timer to avoid overcooking.
Is it okay to eat corn on the cob every day?
Yes, in moderation. One medium ear of corn has about 80 to 100 calories and provides fiber, B vitamins, and antioxidants. As a whole grain, it fits into a balanced diet when paired with protein and vegetables.
Should you remove the silk before microwaving corn?
No, leave the husk on and microwave the whole ear. The husk traps steam that cooks the corn and makes the silk easy to remove afterward. After cooking, let the ear rest for 1 to 2 minutes, then slice off the stem end and pull the husk and silk off in one piece.
Can you freeze cooked corn on the cob?
Yes. Cool the cooked ears completely, wrap each ear tightly in plastic wrap or foil, and place them in a freezer bag. Frozen cooked corn keeps for 6 to 8 months. To reheat, microwave for 2 to 3 minutes or drop into boiling water for 2 minutes.
What is the best way to reheat corn on the cob?
The microwave is the fastest — 30 to 60 seconds per ear wrapped in a damp paper towel. For better texture, reheat in a 350°F oven wrapped in foil for 10 minutes. Avoid boiling again, which can make kernels mushy.
Does corn on the cob need to be refrigerated?
Yes. Fresh, uncooked corn on the cob should be refrigerated and used within 1 to 3 days for best sweetness. Cooked corn should be refrigerated in an airtight container and eaten within 3 to 5 days.
More related posts
 Wellington Airport Flight Turbulence: Winds, Risks & Tips
 Man City vs Tottenham Lineups: Confirmed XI, Team News
 Netflix Free Trial NZ: Is It Still Available? (2025 Guide)
 Main Street Cafe & Restaurant Menu: Prices, PDF & Reviews
 New World Specials This Week: Deals, Mailer & Savings NZ
 Titus Makin Jr.: Why He Left The Rookie
 Nottingham Forest vs Man City Stats: H2H & Recent Match
 Chicken Cashew Stir Fry Recipe (15-Minute Easy Dinner)