How to Make Soap: Beginner’s Guide to Ingredients & Process
There’s something quietly satisfying about turning a few simple ingredients into something you can actually use — especially when you know exactly what went into it. Making soap at home gives you that control, from the oils you choose to the scent you want, with the cold-process method taking about four to six weeks from fats and lye to a finished bar.
Typical cure time: 4 to 6 weeks ·
Essential ingredient: Sodium hydroxide (lye) ·
Common base oils: Olive, coconut, palm, tallow ·
Standard superfat: 5% ·
Mixing temperature range: 100–110°F (38–43°C)
Quick snapshot
- Lye is essential for true soap (Soap Guild (industry authority))
- Cold process soap needs a 4 to 6 week cure (Elly’s Everyday (soapmaking resource))
- Always add lye to water, never the reverse (Lovely Greens (soapmaking guide))
- Exactly when soap reaches skin-safe pH without pH testing strips
- Optimal superfat percentage across different skin types
- How different superfat levels affect lather and longevity across oil combinations
- Pour batter into mold on Day 1; cure ends at Week 6 (Elly’s Everyday (soapmaking resource))
- After curing, test pH with strips before first use
- Gather ingredients for a second batch using lessons learned
These five variables define the chemistry of a successful batch.
| Label | Value |
|---|---|
| Reaction type | Saponification (fat + lye → soap + glycerin) |
| Lye concentration | Typically 33% of water weight |
| Mildness indicator | Superfat of 5–8% |
| Curing environment | Cool, dry, well-ventilated |
| Soap shelf life | 1 year or more when properly stored |
What are the ingredients for homemade soap?
Every bar of real soap comes from the same chemical reaction: saponification, where a fat meets an alkali. The ingredients list is short, but each one plays a specific role.
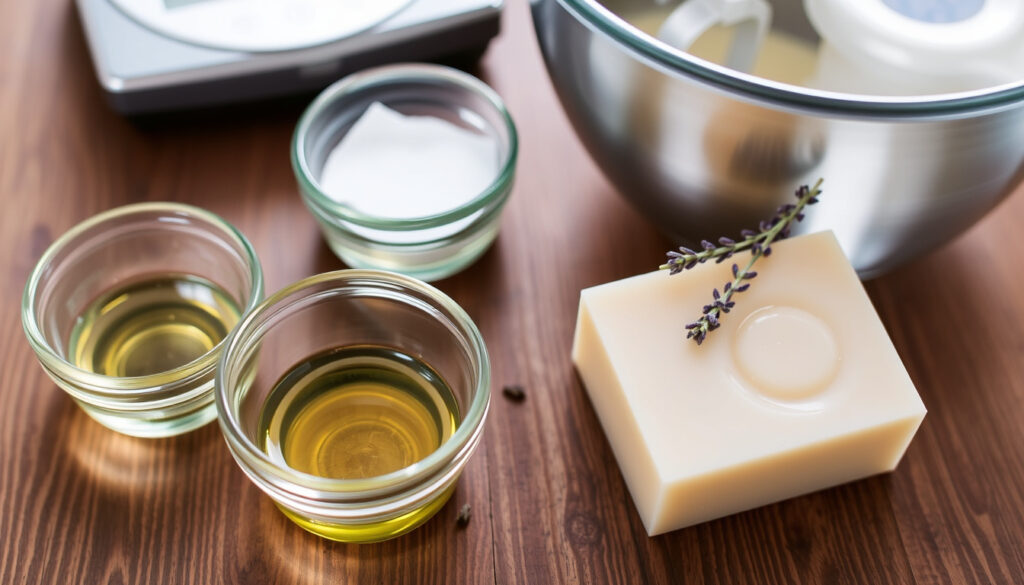
Oils and fats: the base
The fat provides the cleansing and lathering properties. A common beginner ratio, cited by Soap Queen (soapmaking education site), uses 33% coconut oil, 34% olive oil, and 33% palm oil. Substitutions like lard or tallow are also common — the key is understanding each oil’s fatty acid profile.
Lye: sodium hydroxide
Lye — sodium hydroxide — is the alkali that triggers saponification. Without it, you don’t get soap. The Soap Guild (trade organization) emphasizes that the lye solution heats up naturally when mixed with water, so it must be handled with care.
Water or liquid
Distilled water dissolves the lye. Some makers substitute other liquids — goat’s milk, aloe vera, or herbal tea — but these can complicate the process for beginners.
Additives: scents, colors, exfoliants
Essential oils, natural clays, and botanical powders can be added at trace. But Lovely Greens (soapmaking guide) warns that fragrance oils can cause separation if used in excess.
A beginner who skips the lye calculator and guesses oil-to-lye ratios ends up with a bar that’s either greasy or caustic. The superfat — usually 5% — is your safety margin.
The implication: precise ingredient ratios are non-negotiable for safety and quality.
How to make a soap at home for beginners?
The cold-process method follows a predictable sequence. Deviating from the order increases the risk of uneven saponification or unsafe handling.
- Safety gear and workspace
- Mixing the lye solution
- Heating and combining oils
- Blending to trace
- Pouring and molding
- Curing and cutting
Safety gear and workspace
- Wear safety goggles, rubber gloves, and long sleeves (Soap Queen (soapmaking education site))
- Work in a well-ventilated area, away from children and pets
- Keep vinegar nearby to neutralize lye spills
Mixing the lye solution
Measure your water into a heat-safe container, then slowly add the lye while stirring. Elly’s Everyday (soapmaking tutorial) instructs: never pour water into lye — the exothermic reaction can erupt. Stand clear of fumes and let the solution cool to room temperature.
Heating and combining oils
Melt solid oils (coconut, palm, tallow) and mix with liquid oils. The Soap Guild (industry authority) advises bringing the lye solution to 95°F–105°F and the oils within 10°F of that range before combining.
Blending to trace
Pour the lye solution into the oils and use a stick blender in short pulses. Trace — the point where the batter thickens enough to leave a visible ribbon on the surface — signals you’re ready for additives. Lovely Greens (soapmaking guide) notes that over-blending can make batter too thick to pour.
Pouring and molding
Pour into a lined mold and tap to release air bubbles. Insulate with a towel to retain heat and encourage gel phase.
Curing and cutting
After 18 to 24 hours, unmold and cut into bars. Elly’s Everyday (soapmaking resource) recommends a cure of 4 to 6 weeks in a cool, dry space.
For a first-time maker, the biggest risk is rushing the temperature window. Holding oils and lye within 10°F of each other at 100°F reduces the chance of false trace and uneven gel.
The pattern: every step’s success depends on the precision of the one before it.
What are the common mistakes in soap making?
Even experienced soapmakers encounter problems. Three stand out for beginners.
Using too much fragrance oil
Fragrance oils can accelerate trace, cause ricing (grainy texture), or separate entirely. Stick to manufacturer-recommended usage rates — typically 0.5 to 1 ounce per pound of oils.
Not accounting for water discount
A lower water amount speeds curing but makes the batter thicker and harder to pour. The standard is about 33% lye concentration (2:1 water-to-lye ratio).
Incorrect temperature
If oils and lye are too far apart in temperature, the batter may saponify unevenly or develop a false trace — a temporarily thick consistency that doesn’t reflect actual conversion.
The catch: these mistakes are preventable with proper measurement and patience.
How long does homemade soap need to cure?
Curing isn’t optional. During this period, excess water evaporates and saponification completes, yielding a harder, milder bar.
Why curing matters
Freshly cut soap still contains free alkali and excess water. Over 4 to 6 weeks, the pH drops from caustic to skin-safe (around 8–10).
Typical cure times by soap type
Cold process bars: 4–6 weeks. Hot process: 1–2 weeks because cooking accelerates saponification. Castile soap (100% olive oil) may need 6–12 months.
Signs soap is ready
Test with pH strips — the bar should register 8–10. It should feel firm, not soft, and won’t stick to wrapping paper.
Storing cured soap
Wrap in wax paper or store in a breathable bin. Avoid plastic, which traps moisture and can cause the soap to sweat.
The implication: waiting the full six weeks is the most important step after mixing.
Which soap is 100% natural?
There’s no regulated definition of “natural” in soap, but the industry uses a practical standard.
Defining ‘natural’ in soap
Lovely Greens (soapmaking guide) defines natural soap as containing only plant oils, butters, lye, water, and natural additives. No synthetic fragrances, preservatives, or detergents.
Ingredients to look for
- Oils: olive, coconut, palm, shea butter
- Lye: sodium hydroxide (reacts fully, so none remains in finished bar)
- Scents: essential oils like lavender, peppermint, or tea tree
- Color: clays, spirulina, turmeric
Commercial vs homemade natural soap
Many commercial “natural” bars still contain sodium lauryl sulfate or synthetic preservatives. Homemade soap gives you full ingredient control — but only if you start with a trusted recipe and accurate lye calculation.
The pattern: naturalness is about what you leave out, not just what you put in.
The cure timeline follows a predictable sequence of chemical and physical changes.
| Timeline | Event |
|---|---|
| Day 1 | Pour soap batter into mold, insulate |
| Days 2–7 | Saponification continues; soap hardens |
| Weeks 2–3 | Unmold and cut bars |
| Weeks 4–6 | Cure complete; pH drops to skin-safe level |
| Week 6+ | Soap is ready for use |
Confirmed facts
- Lye is essential for true soap
- Cure time of 4–6 weeks is standard for cold-process soap
- Always add lye to water, not the reverse
What’s unclear
- Exactly when soap reaches skin-safe pH without testing strips
- Optimal superfat for all skin types
“Making soap at home allows you to control every ingredient, ensuring a product free from synthetic additives.”
— Wellness Mama (natural living resource)
“A typical beginner recipe uses 60% lard, 20% coconut oil, and 20% olive oil with a 5% superfat.”
— SoapmakingForum user
The cold-process method rewards patience over speed. For the home soapmaker in New Zealand or anywhere with a cool, dry pantry, the implication is clear: measure precisely, respect the lye, and wait the full six weeks. A rushed batch yields a soft, short-lived bar. A cured one lasts a year or more.
For those concerned about safety, it is worth checking the recent soap recall in Canada to ensure your ingredients are not affected.
Frequently asked questions
Is soap making dangerous?
Lye is caustic, but with proper safety gear — goggles, gloves, long sleeves — and a ventilated workspace, the risks are manageable. Always add lye to water, never the reverse.
What is the difference between cold process and hot process soap?
Cold process relies on the heat of saponification and requires a 4–6 week cure. Hot process uses external heat to accelerate saponification, shortening the cure to 1–2 weeks.
Can I use any type of oil?
Most oils work, but each produces different properties. Coconut oil creates lather, olive oil adds mildness, and hard oils like palm or tallow contribute bar hardness.
How do I calculate the correct amount of lye?
Use a lye calculator — enter your oils and superfat percentage. The calculator returns the exact lye weight. Never guess; over- or under-lye affects safety and quality.
Why did my soap separate or develop cracks?
Separation often means temperature mismatch between oils and lye, or insufficient blending. Cracks indicate air trapped during pouring or a too-hot gel phase.
Can I add fresh herbs or milk to my soap?
Yes, but fresh ingredients can introduce sugars and proteins that accelerate trace or cause spoilage. Use dried herbs or freeze fresh milk into ice cubes before adding to lye.
How do I know when my soap is safe to use?
Test pH with strips — it should read 8–10. Also check firmness: a properly cured bar feels hard and doesn’t stick to fingers. When in doubt, wait another week.
More related posts
 When Does Winter Start in New Zealand? Dates, Months & Climate
 Monster Trucks Eden Park 2025: Length, Cost & Tips
 Gluten Free Beer NZ: Certified & Reduced Options Guide 2025
 Best Productivity Chrome Extensions 2026: Top Picks
 SEEK Jobs Hawke’s Bay: Best Platforms for Work in 2026
 Loui e Penny Book in Order with Summarie
 New World Specials This Week: Deals, Mailer & Savings NZ
 Homes for Sale Palmerston North: Listings & Prices
